Tesla Quick Start Guide – Must Know Beginners Tips & Tricks
We're an affiliate
We hope you love the products we recommend! Just so you know, we may collect a share of sales or other compensation from the links on this page. Thank you if you use our links, we really appreciate it!

Table of Contents
Get ready to exceed your expectations and make your Tesla journey awesome! Whether you’re embarking on your first electric adventure or refining your Tesla expertise, this article ensures that you’re fully prepared from the moment you take delivery. Dive into the prepared Tesla quick start guide we’ve listed to help ease your introduction of owning a Tesla
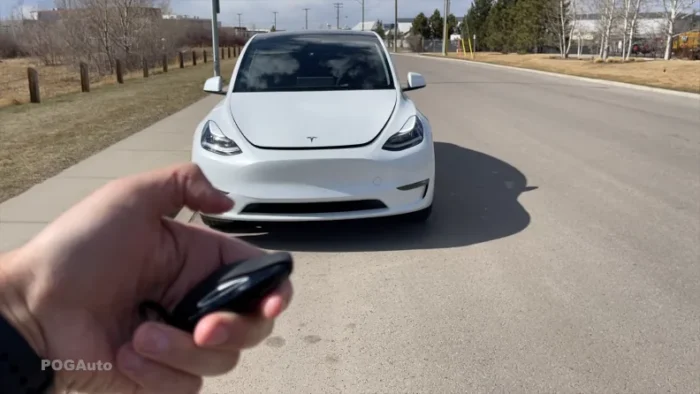
Tesla Quick Start Guide – Methods to Entering Your Tesla
Tesla model has three types of key that allow the users to choose their way of entering their Tesla
Phone keys
Pair your phone using Bluetooth; your phone key supports automatic locking and unlocking.

- On the main menu, you will see an option that says Setup Phone Key. Tap on the option

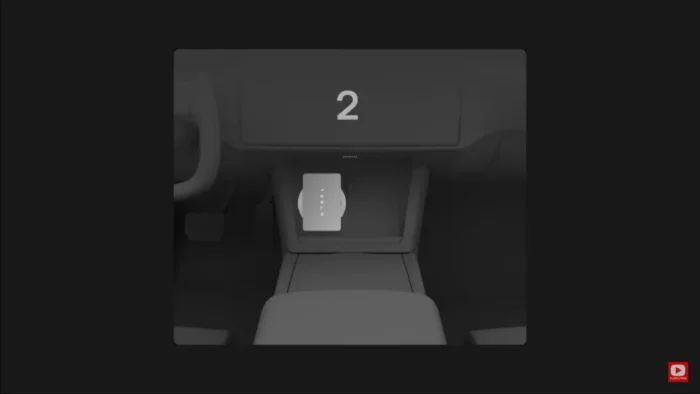
- Tap on “Pair” and place your key card on the center console.
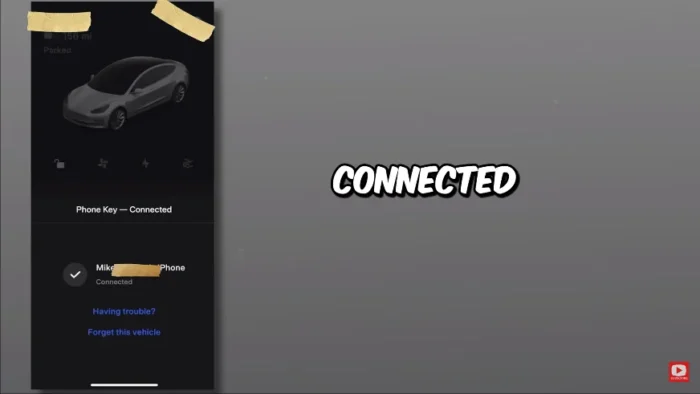
- The screen should display Phone Key Connected.
Using a phone key is a convenient way to access your Tesla; your phone detects when you pull a door handle, and the door unlocks. When you walk away with the phone key, the door automatically locks with the walk-away door lock feature (Control > locks > walk-away door lock).
Key card
Tesla provides two key cards that communicate with Model 3 using short-range radio-frequency identification (RFID) signals. Tap the key card beneath the camera positioned on the B pillar between the driver and passenger doors. The key card does not support automatic locking and unlocking.
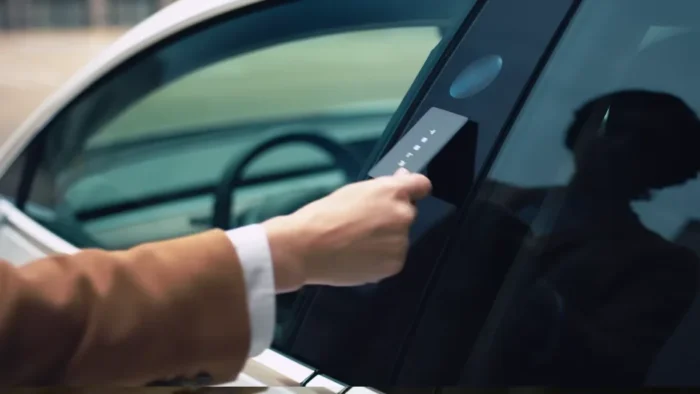
- 1. Tap the Tesla key card on the driver’s side door pillar to unlock the car.
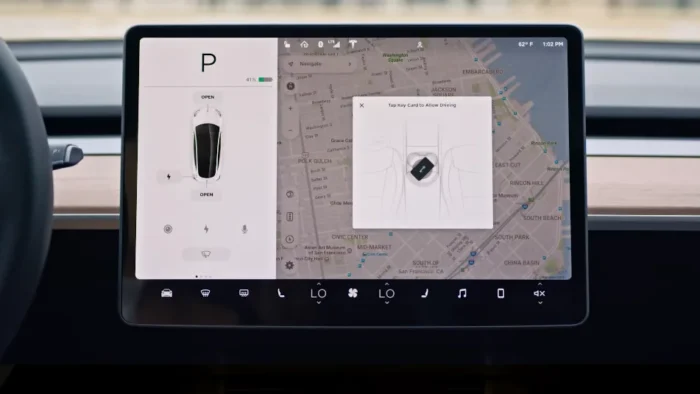
- 2. The Tesla’s touchscreen display shows a prompt to Tap the Key Card to Allow Driving.
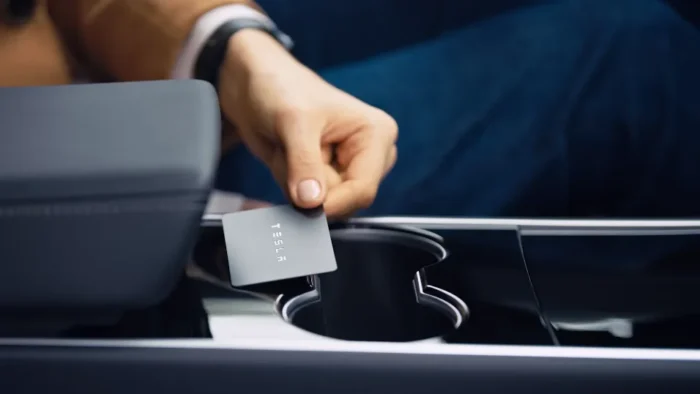
- 3.Place the Tesla key card on the center console to activate driving
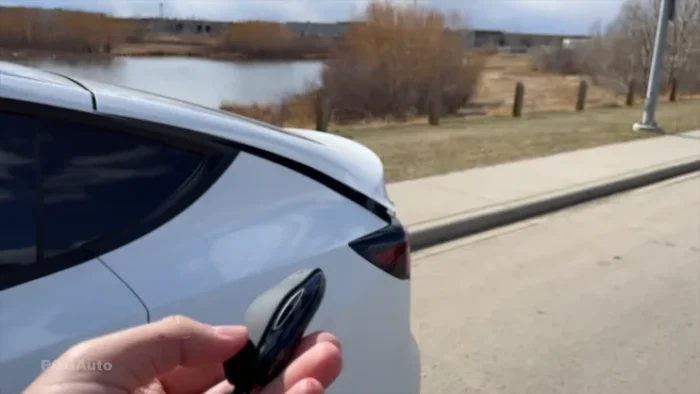
Key Fob
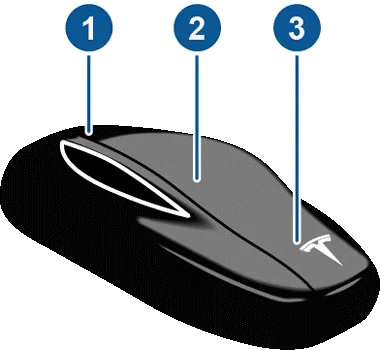
The key fob allows you to press buttons to unlock/unlock, open the front and rear trunks, and drive the Tesla. This key supports automatic locking and unlocking by on the feature (Control > locks > walk-away door lock)
- 1. Two clicks – open/close the rear and hold down for 2 seconds to open the charge port door.
- 2.One-click to lock the car, two clicks to unlock the car
- 3. Two clicks to unlock the front trunk
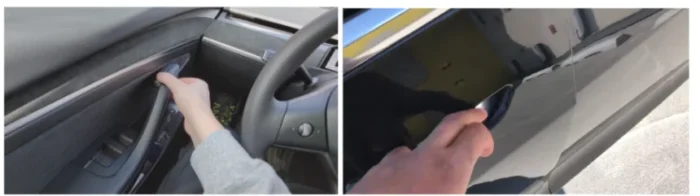
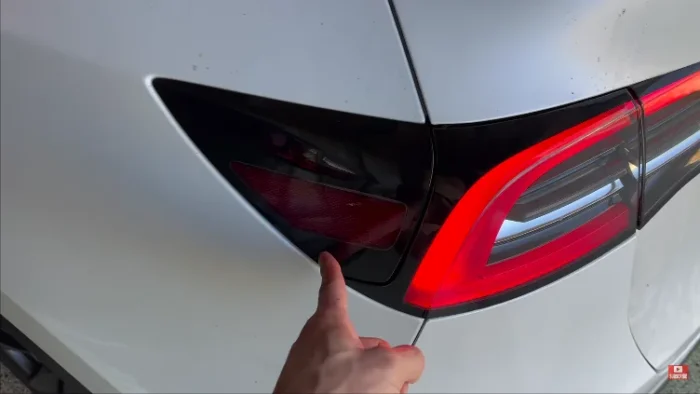
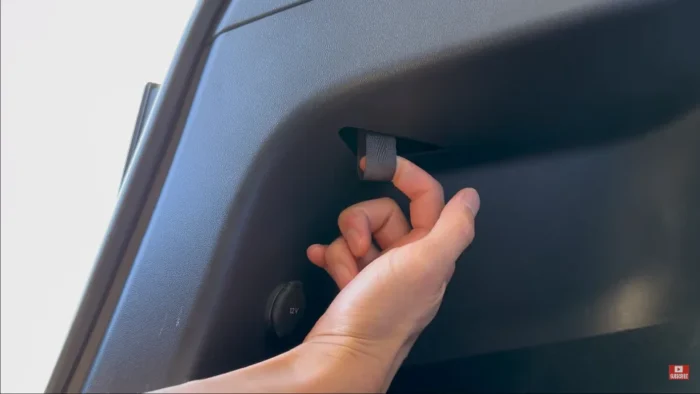
Manually Opening the Door: A Guide to Accessing Your Tesla
Learn how to manually unlock your Tesla so that you may enter it easily and conveniently if your app, key fob, or key card isn’t working.
Starting Your Tesla Key Steps and Drive Modes
There are a few easy procedures that anybody can take to get your Tesla ready to drive. With these steps, you’ll be driving in no time, from starting the car to choosing the right drive mode.
- Put the key card behind the cupholder in the centre console.
- Press the brake pedal to turn the Tesla on.
- Then choose the drive mode.
Tesla Quick Start Guide to Drive Mode Model Y
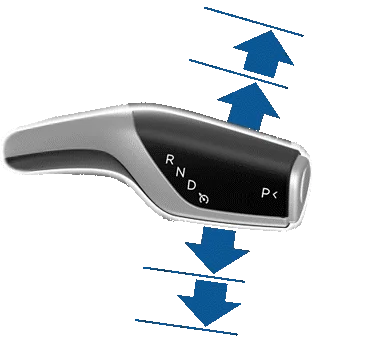
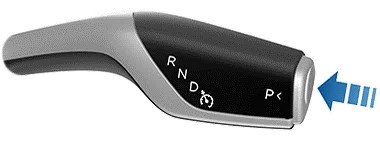
Operating your Tesla’s drive modes involves a few simple steps. Begin by pressing the brake pedal to initiate any changes. To shift into Reverse, push the drive stalk up and release it. Neutral can be engaged by pushing the stalk up or down to its first position, while Drive is selected by pushing the stalk downward and releasing it. To park your Tesla, press the end of the drive stalk when the car is stationary.
Tesla Quick Start Guide to Drive Mode Model 3
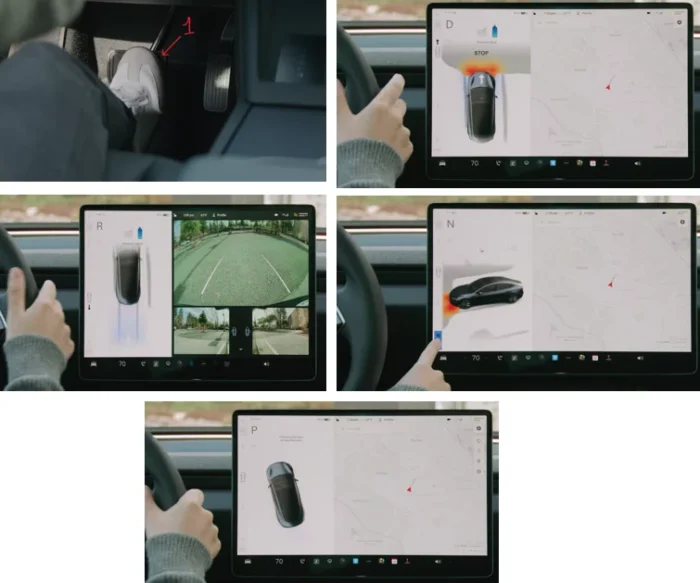
Operating the drive modes on the Model 3 offers multiple options for convenience and ease. Using the touchscreen, swipe up for Drive, swipe down for Reverse, or touch P for Park or N for Neutral. Additionally, you can use the overhead console where pressing P, R, N, or D requires you to first press the brake pedal for activation. This flexibility ensures that shifting between modes is straightforward whether you prefer touchscreen or console controls.
Tesla Quick Start Guide – Dynamic Tesla Steering Wheel
Tesla provides cutting-edge steering choices to improve your driving pleasure. For more comfortable and controlled driving, these are ways to change the steering weight and wheel alignment to your liking.
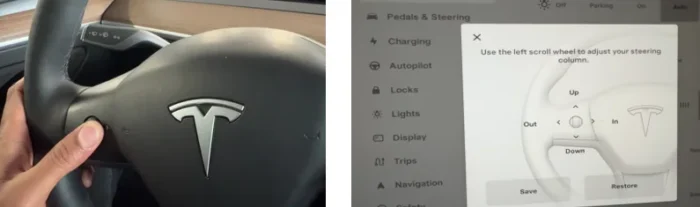
- Adjusting steering wheel: touch the steering icon on the screen then use the left scroll button on the steering to move the steering wheel.
- Adjusting steering weight: touch on the touchscreen (Control > dynamics > steering weight).
- There are 3 options, light, medium, and heavy.
Tesla Quick Start Guide- Navigating with Autopilot
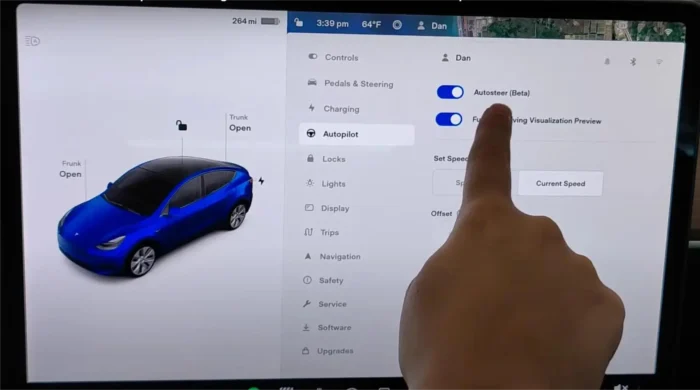
To activate the autopilot feature, you must first enable Autosteer by clicking (controls > Autopilot > Autosteer).
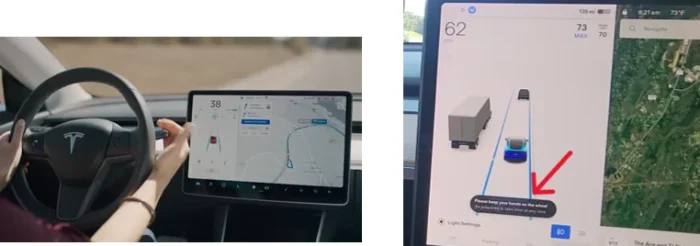
Autosteer utilizes Tesla’s cameras to detect and track lane lines, enabling the vehicle to steer automatically and maintain its position within the lane. To activate autosteer, pull the gear stalk down twice quickly after activating it, indicated by two beeps and confirmation on the screen that autopilot is engaged. It’s important to remain attentive, monitor the road, and keep your hands on the wheel while autopilot is active. This ensures safe operation and readiness to take control if needed.
Tesla Charging Made Easy
Charging your Tesla is a crucial part of the electric vehicle experience. This section covers everything from locating the charge port to configuring charging settings, ensuring you’re always ready to hit the road.

- Press the button on the charger: This will unlock and open the charge port.
2. Press the lid: Gently press on the charge port lid to open it.
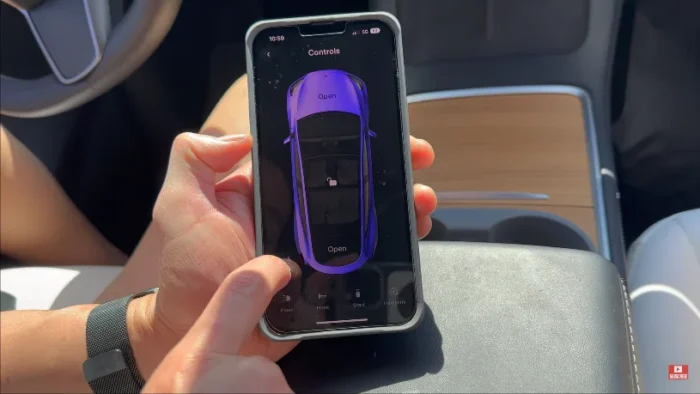
3. Use the app: Open the Tesla app, go to the Charging section, and select “Open Charge Port.”
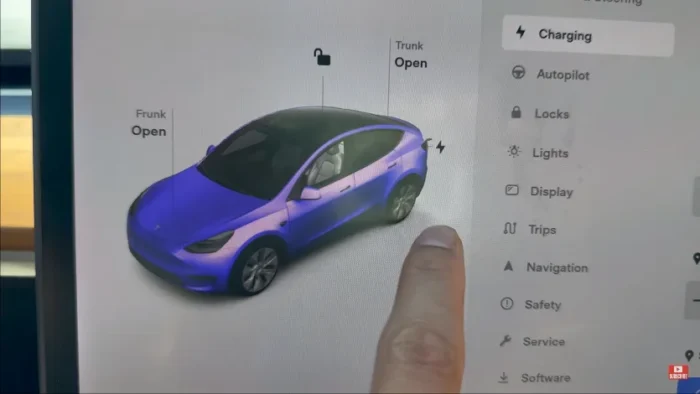
4. Use the Tesla screen: On the car’s touchscreen, go to Controls > Charging > Open Charge Port.
Manual Unlocking of the Charge Point From Inside
- First, ensure the car is not actively charging by stopping the charge on the Tesla app or screen.
- For Model 3, Model Y, and Model X, find a triangular cutout on the left side inside the trunk.
- Look for a small hole and handle to unlock the charge port manually by pulling the handle down.
- Make sure no one is pulling the cable while you do this, as it can cause electrocution if the car is still charging.
- For Model S, the process is similar, but with a lid. Just pull the cable to unlock.
Charge Port Light
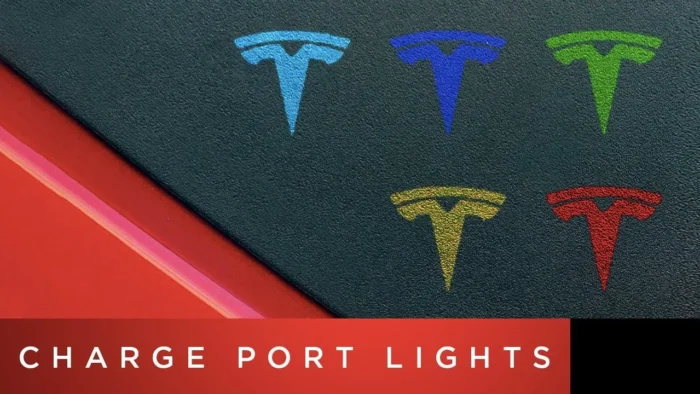
- Light blue or white: The charging port door is open.
- Blue: The automobile is not charging even when the charger is connected.
- Blue blinking: The vehicle is getting ready to charge.
- Blinking green: The automobile is getting close to a full charge and is currently charging.
- Solid orange indicates that the connection is not fully put into the charging port; solid green indicates that charging is finished.
- Amber blinking: The vehicle is only receiving AC charging at a lower current.
- Red: A defect has been identified, and charging has been halted.
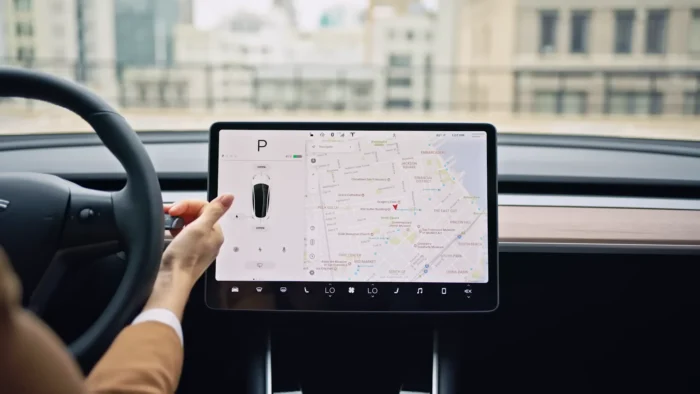
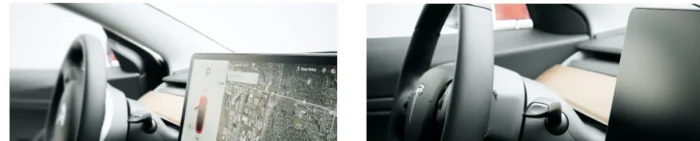
Tesla Quick Start Guide to Command Center: The Touchscreen
The touchscreen in your Tesla is the central hub for controlling various functions and accessing information. Explore how to interact with the touchscreen, use voice commands, and utilize split-screen view for a seamless driving experience.
- Press the power button located in the lower right corner of the screen to turn on the display. When you open the door, the touchscreen powers on. The car will powers off after shifting into park and exiting.

- You can touch the text or icons to interact with the display. As an alternative, you can browse menus and lists by using the steering-wheel scroll button.
- Voice commands are another way to use the touchscreen.
- Speak your instruction after pressing and holding the voice commands button on the steering wheel (model 3)
- On the steering wheel, press and release the right scroll wheel button. For Model Y, voice your order when you hear the chime.

- Pop-up messages and car alerts: pop-up messages show up at the touchscreen’s bottom. If a warning pops up, click Learn More to see more information about it. Swipe a popup message down to close it.
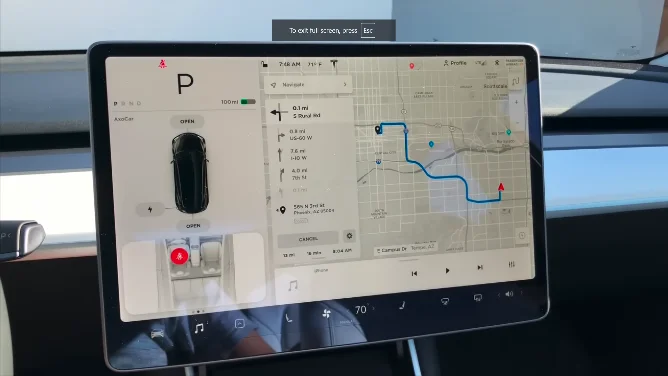
- Navigate: To input a destination and obtain instructions, utilize a touchscreen. The map may also be used to show where you are right now.
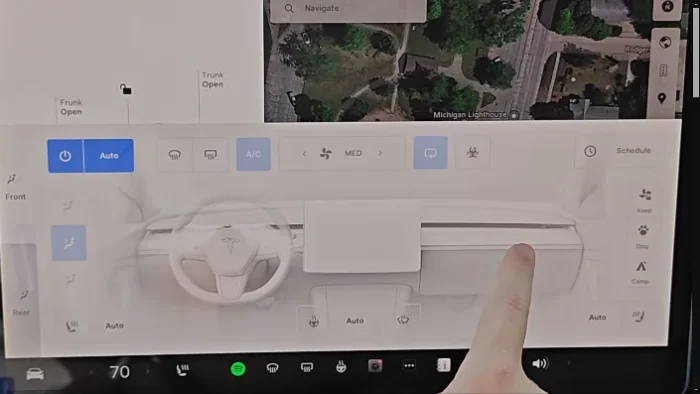
- Climate control: The touchscreen allows you to change the fan speed, temperature, and other climate control parameters.
How to Restart the Touchscreen
You can restart the Touchscreen if it is unresponsive. The touchscreen-only can restart when the car is stopped and in the park.
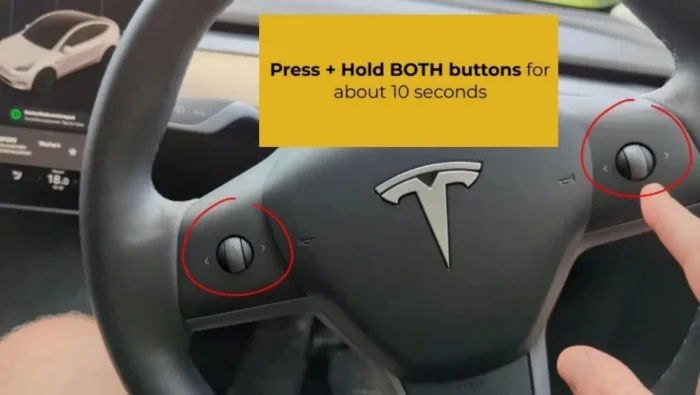
- Shift the driving mode to park
- Hold down both scroll buttons on the steering wheel until the touchscreen turns black.
- After a few seconds, the Tesla logo appears.
- Wait 30 seconds for the touchscreen to restart.
Guarding Your Tesla: Sentry Mode
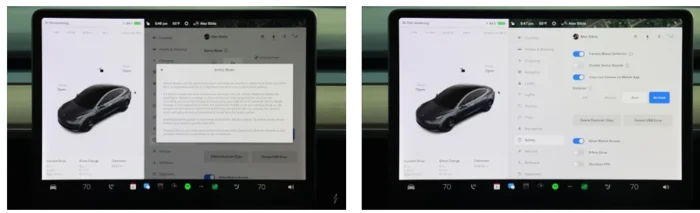
Sentry Mode ensures a Tesla remains protected by keeping its built-in cameras and proximity sensors active even when the vehicle is parked or powered off.
- To enable Sentry Mode, navigate to Controls > Sentry Mode > On.
- Ensure the dashcam is also activated under Controls > Safety > Dashcam for Sentry Mode to function properly.
- Once enabled, the Sentry Mode icon in the controls menu turns red.
- You can manage Sentry Mode settings and view alerts through the Tesla mobile app.
It’s important to note that Sentry Mode requires a minimum battery level of 20%. If the battery falls below this threshold, Sentry Mode will automatically deactivate, and you’ll receive a notification on your mobile app.
Accelerating with Speed Assist
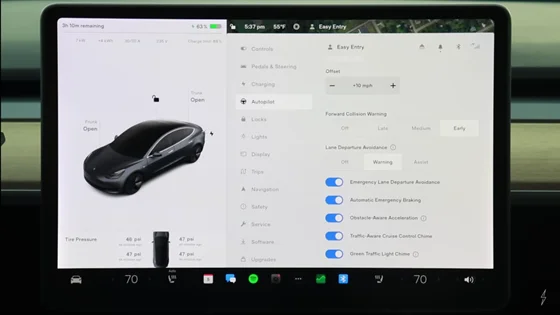
The touchscreen in a Tesla displays the current speed limit and offers customizable notifications for exceeding it. Some Tesla models highlight the speed limit icon with a blue outline when the speed limit is exceeded. To adjust these settings, navigate to Controls > Autopilot > Speed Limit Warning. From there, you can customize how notifications are handled:
- Off: Speed limit warnings are disabled.
- Display: A speed limit sign appears on the touchscreen, increasing in size when you exceed the set speed limit.
- Chime: Both visual and audible alerts are triggered when you exceed the speed limit.
- Relative: You can set a speed limit offset (+ or -) relative to the posted limit.
- Absolute: Manually specify any speed limit between 30 and 240 km/h.
Conclusion
Ownership of a Tesla means walking into the future—advanced, user-friendly technology literally at your fingertips. This quick start guide with some essential tips and tricks to optimize your experience from using your phone as a key to navigating using Autopilot. These features provide a seamless, enjoyable journey, making each drive an innovative adventure. Welcome to the Tesla community—your all-electric journey starts now
Categorised in: Advice, Automotive, How-tos